


I've been wanting to try this tutorial from Pshiiit for a long time now, and thought I'd put my own spin on it by using my beloved purple polishes :). My manicure isn't as perfect as her's, but I like it nonetheless.
Here's the polishes I used for this manicure (excuse my dog's stuffed pig in the background, haha): OPI Natural Nail Base Coat, China Glaze's Coconut Kiss, In a Lilly Bit, Gamer Glam, Lotus Begin, Bizarre Blurple, Tart-y for the Party, OPI's Alpine Snow, Wet n' Wild's Black Cream, and OPI's RapiDry Top Coat.

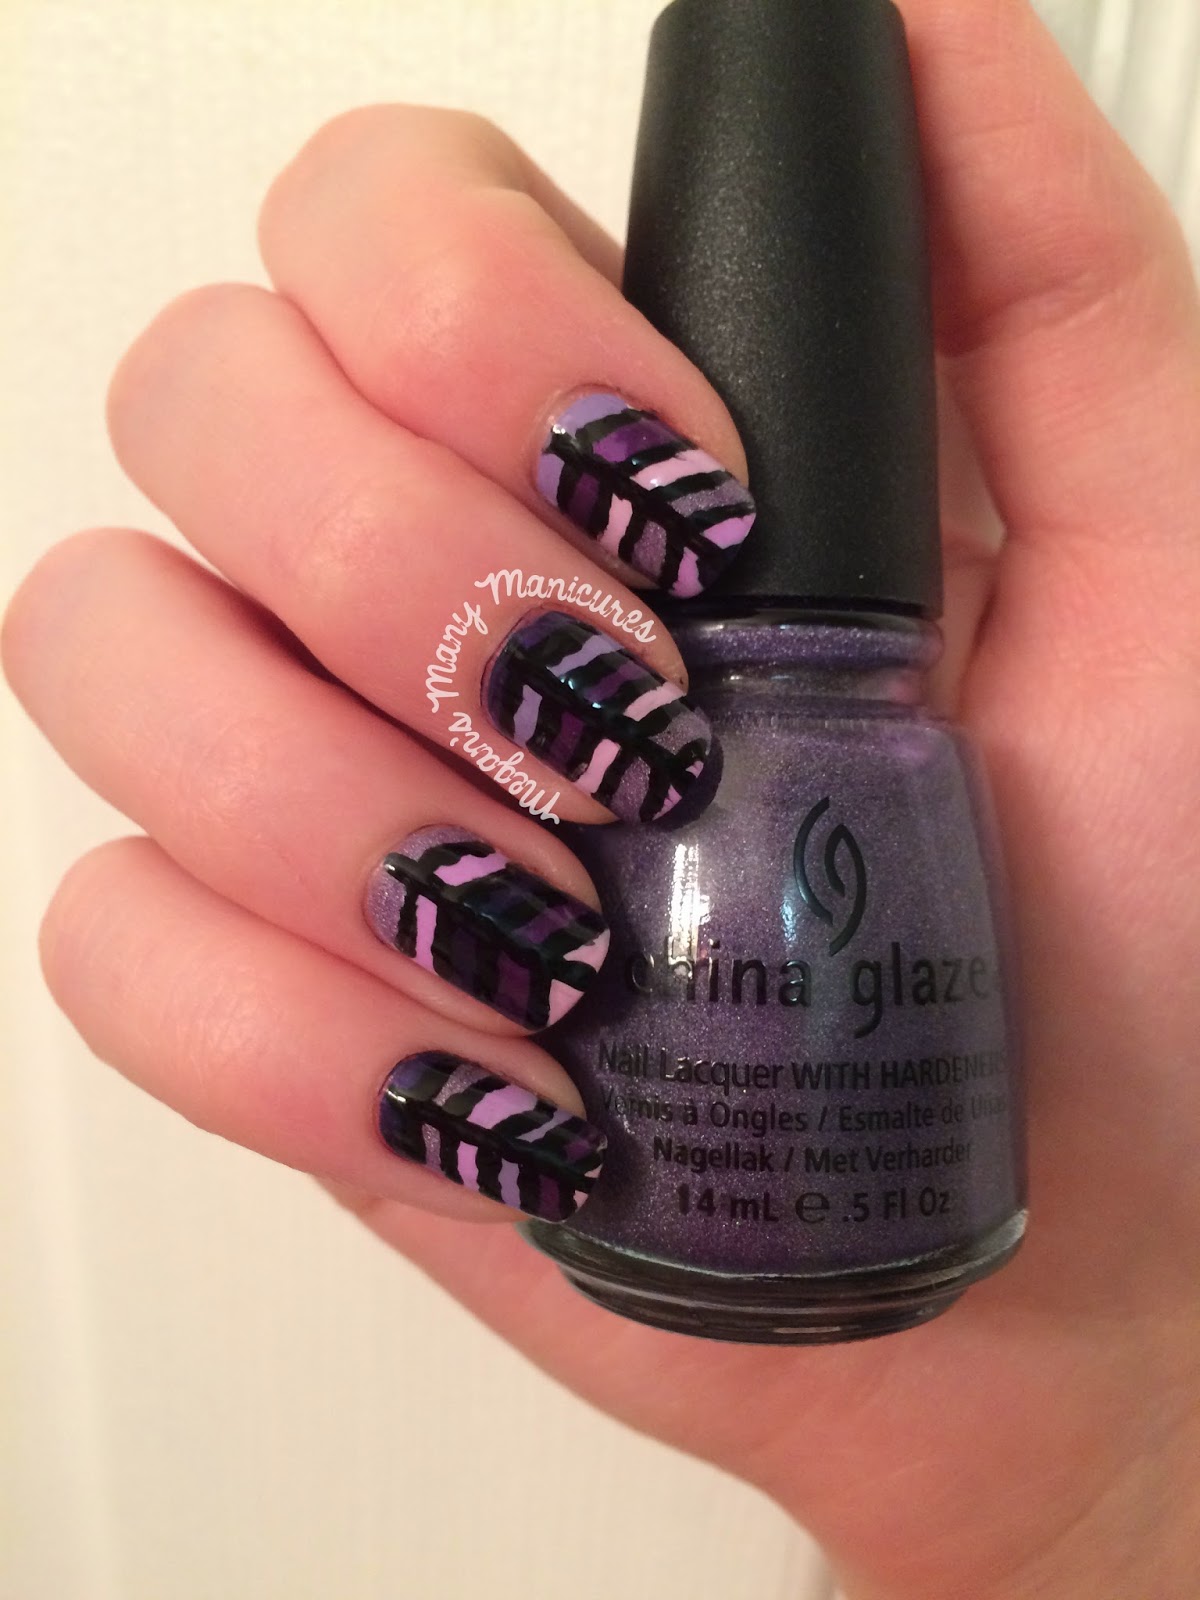
If you can't view Pshiit's tutorial for any reason, I'll explain the process. I began by painting my nails white. When that dried, I used a nail art brush to paint 5 black dots down the center of my nails. Then I painted two black lines coming up from each dot in a V shape. Then, using the nail art brush, I painted a different colour on each layer of the design, switching the order on each nail. Once that dried, I repainted the black lines and added one black line going down the center of each nail. I finished this manicure off with a coat of top coat.
 |
| Here's a couple of close-ups to show the design up close :) |

This design looks really intimidating at first, but drawing the stripes wasn't as bad as I thought. My lines are a little shakier than I would like, but I still really like them. I find this girl awesome for tutorials and her illustrations really help.


What do you think? Have you tried this look before?
Thanks for stopping by!
No comments:
Post a Comment